
Sierra Greenhouse Insights
Lean-To Greenhouse Guide: Siting, Attachment and Tradeoffs
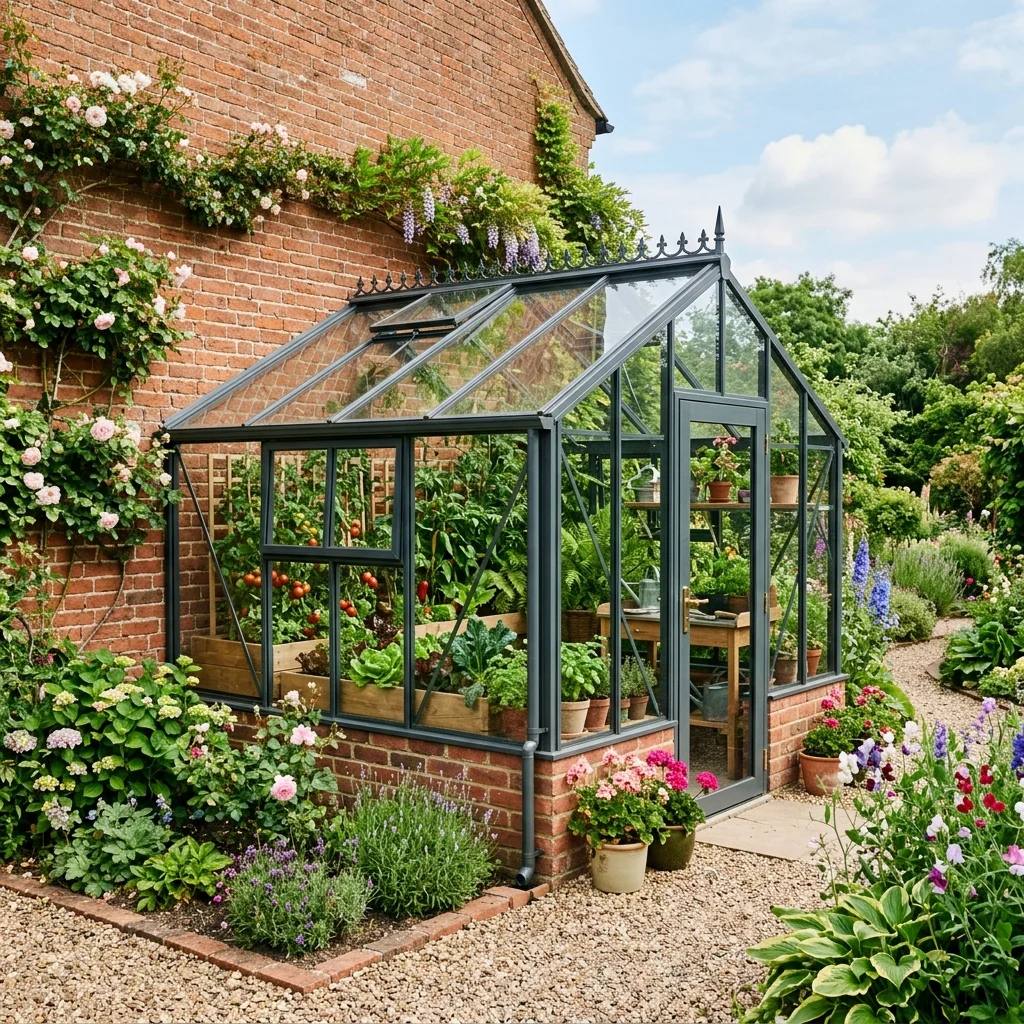
A lean-to greenhouse attaches to a house, garage, or other building and uses that wall as one side. It is a strong choice for a narrow site with a sound, sunny wall, but it is only a good value when flashing, drainage, ventilation, structural loads, and moisture control are designed correctly. Do not assume that every south-facing wall is suitable or that attachment guarantees a specific heating-cost reduction.
This guide is for planning and product comparison. It is not structural, waterproofing, electrical, or permit approval for a specific building.
Quick navigation: Lean-to vs freestanding | Site check | Attachment | Climate | Buying checklist | Sources
Key Takeaways
- Measure winter and summer sun at the proposed wall; a compass direction alone is not enough.
- Confirm the wall, foundation, flashing, and drainage details before ordering a kit.
- Plan high and low vents because an attached wall removes one cross-ventilation face.
- Treat humidity migration into the building as a design risk.
- Use local wind, snow, safety-glazing, and permit requirements—not generic online load claims.
Lean-to vs freestanding greenhouse
| Factor | Lean-to greenhouse | Freestanding greenhouse | | ---------------- | ----------------------------------------------------------------------- | ------------------------------------------------------------------ | | Footprint | Uses an existing wall; useful in narrow yards | Needs clearance on all sides | | Exposed envelope | One side is the building wall | Glazing or cladding on every side | | Light | Wall blocks one side; orientation and shading are critical | More potential light from multiple directions | | Ventilation | Needs deliberate high/low vent layout | Cross-ventilation is often easier to arrange | | Building risk | Flashing, penetrations, humidity, and drainage affect the host building | Isolated from the house but needs its own foundation and utilities | | Expansion | Constrained by wall length, roofline, doors, and windows | More freedom to choose size and orientation |
Site and wall suitability
Measure seasonal sunlight
In the Northern Hemisphere, south-facing glazing is a useful starting point for winter solar collection. The University of Minnesota Extension deep-winter greenhouse design uses an east-west building position and a steep south-facing glazing wall to capture low winter sun. That specialized passive-solar design should not be treated as proof that every hobby lean-to needs the same geometry.
Observe the proposed wall near the winter solstice and summer solstice, noting shade from roof overhangs, trees, fences, and adjacent buildings. A southeast wall may warm early; a west wall can create difficult summer afternoon heat. Crop goals and local climate determine which tradeoff matters.
Inspect the host building
Check for rot, cracking, loose masonry, damaged siding, failed gutters, and existing moisture. Identify doors, windows, vents, utility lines, eaves, and foundation steps. A greenhouse should not block an emergency opening, combustion-air inlet, dryer vent, or required service access.
Plan water before the frame
Roof runoff must move away from both structures. Decide how the greenhouse roof, building roof, flashing, gutters, and ground drainage work as a system. Avoid a low point where irrigation water and condensation collect against the wall.
Attachment, flashing, and structure
An attached greenhouse transfers wind, snow, and dead loads through its anchors and foundation. Follow the engineered kit instructions and local requirements for anchor spacing, fastener type, substrate, and design loads.
Critical details include:
- a level foundation or sill appropriate to the soil and structure;
- attachment into the specified structural substrate, not decorative cladding alone;
- continuous head flashing and end details that direct water outward;
- compatible sealants, gaskets, and corrosion-resistant fasteners;
- an inspection path for future leaks and failed seals;
- safety glazing where required by code or location.
Do not improvise by fastening through vinyl siding or relying on a bead of caulk as the primary water-management system. A contractor or engineer should review uncertain walls, overhead glazing, high snow loads, and exposed wind sites.
Heat, thermal mass, and ventilation
A masonry wall can absorb solar heat and release some of it after sunset. The U.S. Department of Energy's passive solar design guide explains the roles of solar aperture, absorber, thermal mass, and distribution. The benefit depends on whether sunlight reaches the wall, the wall's material and finish, insulation, air leakage, and the temperature difference.
An attached wall can also reduce wind exposure, but the greenhouse may still overheat quickly. Provide low intake and high exhaust paths, then size active ventilation where natural venting cannot meet the crop load. Keep humid greenhouse air from entering wall cavities or the occupied building.
Use a maximum-minimum thermometer or data logger before adding valuable crops. The actual readings are more useful than a generic claim that attachment makes a greenhouse a fixed percentage warmer.
Lean-to greenhouse buying checklist
Before buying, verify:
- exterior kit dimensions plus door swing, roof vent travel, and service clearance;
- wall height, eave, gutter, downspout, window, and utility conflicts;
- local design wind and snow loads;
- foundation and anchor requirements;
- glazing type, thickness, safety classification, and replacement availability;
- roof and wall vent area, automatic openers, fan mounting, and power needs;
- flashing supplied by the kit versus flashing designed on site;
- condensation drainage and interior water-resistant surfaces;
- permit, setback, property-line, and homeowners-association rules;
- a storm, freeze, and power-failure plan.
Use the surface-area calculator to estimate glazing coverage and the ventilation calculator to begin airflow planning. Calculators are planning aids, not structural approval.
Frequently asked questions
Can a lean-to greenhouse damage the house?
Yes, if penetrations leak, flashing is incomplete, humid air enters the wall, or drainage holds water against the foundation. A correctly designed attachment manages water in layers and remains inspectable.
Is a lean-to greenhouse always cheaper?
No. It may use less greenhouse cladding, but site-specific flashing, foundation work, wall repair, utilities, and permits can offset the material saving. Compare complete installed scope, not kit price alone.
Sources and methodology
- University of Minnesota Extension: Deep winter greenhouses
- U.S. Department of Energy: Guide to passive solar home design
- Utah State University Extension: Extending the garden season
This guide applies primary-source passive-solar and season-extension principles to attached hobby greenhouses. Exact attachment, flashing, glazing, and load requirements must come from the kit documents, site conditions, local code, and qualified professionals.