
Sierra Greenhouse Insights
Growing Turmeric In A Greenhouse: The Complete Guide
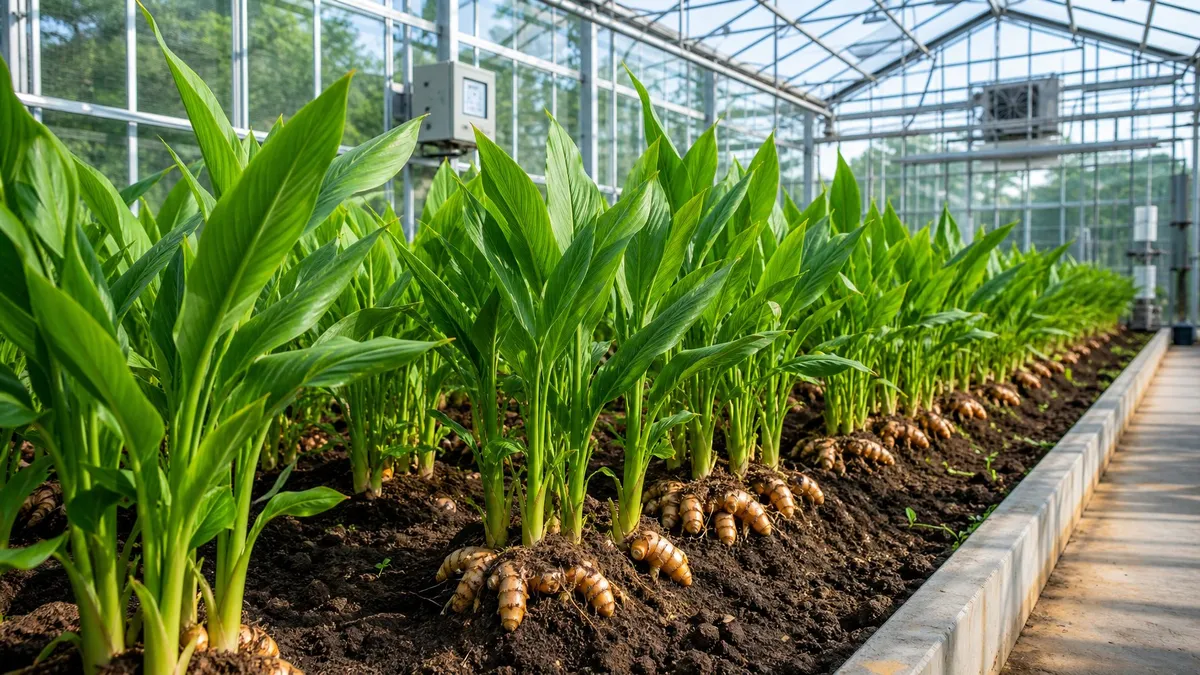
Turmeric is one of the most rewarding crops you can grow under glass or polycarbonate, but it asks for conditions most outdoor gardens in North America simply cannot deliver. As a tropical member of the Zingiberaceae family, Curcuma longa needs eight to ten months of steady warmth, high humidity, and rich soil to produce plump, golden rhizomes packed with curcumin.
A greenhouse solves the biggest challenge of growing turmeric in cooler climates by giving you full control over temperature, moisture, and light for the entire eight-to-ten-month growing cycle. Whether you garden in USDA zone 4 or zone 9, the right setup lets you harvest fresh turmeric root that rivals anything from the tropics.
This guide walks you through every step, from picking and preparing your seed rhizomes to lifting, curing, and storing the finished crop. You will learn exactly how to plant turmeric in beds, grow bags, or pots, how to keep roots warm without inviting rot, and how to read the plant's own signals when harvest time arrives.
Key Takeaways
- Turmeric needs daytime temperatures of 68–86°F, consistent humidity around 60–80%, and eight to ten months of warm conditions to mature fully.
- Planting healthy, budded rhizome pieces 2–3 inches deep in well-draining, compost-rich soil gives your crop the strongest start.
- Yellowing and dying foliage at the end of the season tells you it is time to harvest, cure, and store or replant your rhizomes for next year.
What Turmeric Needs To Thrive Under Cover

Successful turmeric production under cover depends on keeping three variables in the right range at the same time: heat, light, and humidity. Get those dials set correctly and the turmeric plant practically grows itself, pushing out broad green turmeric leaves and steadily fattening its underground rhizomes with curcumin-rich flesh.
Climate, Light, And Humidity Basics
Turmeric performs best when daytime air temperatures stay between 68°F and 86°F and nighttime temperatures never drop below 55°F. Soil temperature matters just as much; aim for at least 70°F during the day and no lower than 55°F at night.
Humidity should hover between 60% and 80%. If your greenhouse runs dry, misting systems or a shallow tray of water near the plants will help. Stagnant, overly wet air invites fungal problems, so balance moisture with gentle airflow.
For light, turmeric thrives in full sun to partial shade. Inside a greenhouse, six to eight hours of bright indirect or filtered light works well. In deep winter at northern latitudes, supplemental LED lighting for four hours a day can keep growth on track when you grow turmeric indoors through the short days.
How Long The Crop Takes To Mature
Plan on eight to ten months from planting to harvest. Turmeric is a slow grower compared to most greenhouse vegetables. Rhizomes planted in late February or March will typically be ready between October and December.
Because the cycle is so long, starting early matters. Every week of delay in spring pushes harvest deeper into cold weather and increases your heating costs. Mark your planting date on the calendar so you can track progress against that eight-to-ten-month window.
Best Greenhouse Setups For Cool Vs. Warm Zones
In USDA zones 8–11, an unheated or minimally heated greenhouse often provides enough warmth for the full growing season. Passive solar gain and double-wall polycarbonate glazing may be all you need.
In zones 3–7, you will need active heat. A thermostat-controlled heater set to maintain 55°F overnight, combined with soil-heating mats for young plants, keeps costs manageable. Sierra Greenhouse's heating calculators can help you estimate seasonal costs for your specific zone and greenhouse size. Consider placing turmeric near thermal mass like water barrels to buffer temperature swings during cold spring nights.
Choosing And Preparing Rhizomes For Planting
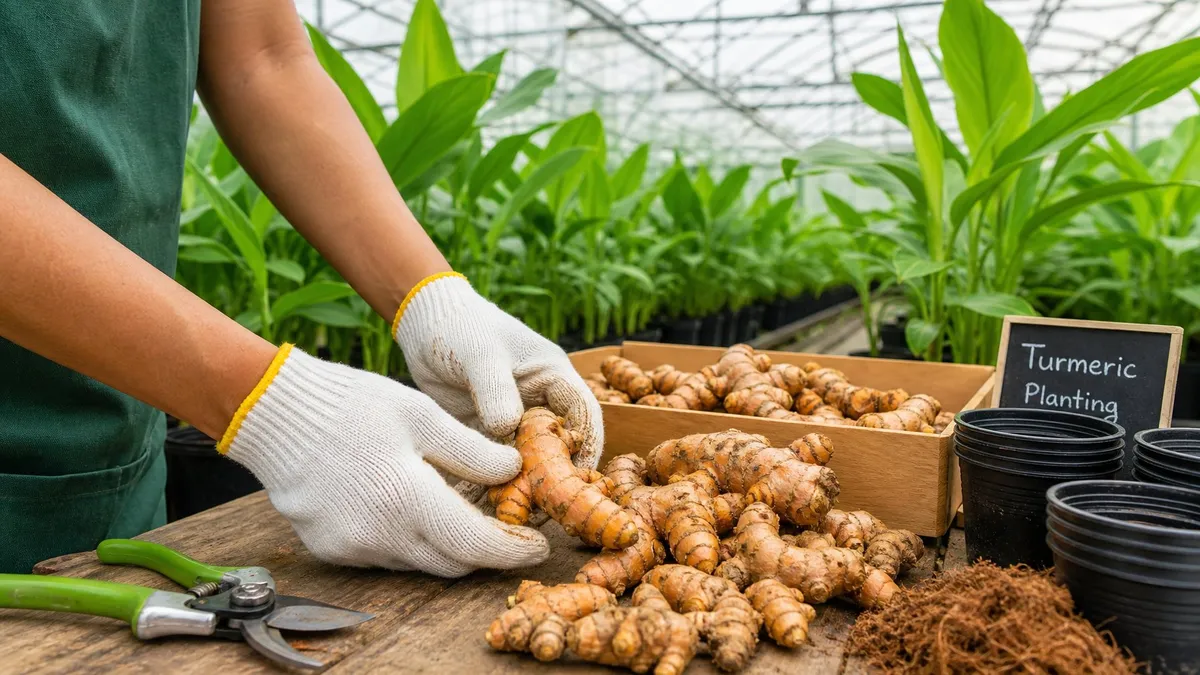
The quality of your seed rhizome determines how quickly your turmeric sprouts and how large the final harvest grows. Fresh, plump turmeric rhizomes with visible buds give you a major head start over shriveled or dormant pieces.
Where To Find Good Seed Stock
Your best sources for turmeric seed stock are specialty seed catalogs, online nurseries, and farms that sell certified disease-free rhizomes. These suppliers offer turmeric varieties selected for vigor, curcumin content, or climate adaptability.
Organic turmeric from a grocery store can work in a pinch, but there is a risk. Some store-bought fresh turmeric has been treated with growth inhibitors that slow or prevent sprouting. If you go this route, look for organic, untreated turmeric roots and ask the produce manager whether the stock has been treated. Farmers' markets are another good option for finding local, untreated rhizomes.
How To Select Healthy Budded Pieces
Look for turmeric rhizomes that are firm, heavy for their size, and free of mold, soft spots, or wrinkled skin. Each piece you plant should have at least one or two visible buds, sometimes called "eyes." These small pointed bumps are where new shoots will emerge.
Avoid pieces that feel lightweight, hollow, or mushy when pressed. A healthy turmeric root will snap cleanly if bent and show bright yellow or orange flesh inside.
Larger "mother" rhizomes with multiple buds tend to produce stronger plants, but even a small finger-sized piece with one good bud can grow a full plant over the course of a season.
Cutting, Callusing, Soaking, And Pre-Sprouting
If your rhizomes are large, cut them into pieces roughly one to one and a half inches long, making sure each piece has one or two buds. Use a clean, sharp knife to make smooth cuts.
After cutting, let the pieces dry in a warm, shaded spot for two to three days. This callusing step lets the cut surface seal over, reducing the risk of rot once planted.
If your turmeric rhizomes look shriveled or dried out, soak them in room-temperature water for 12 to 24 hours before planting. This rehydrates the tissue and signals the buds to wake up.
For pre-sprouting turmeric, place pieces on a tray of damp paper towels inside a sealed plastic bag or container. Keep them in a warm spot around 80–86°F. A seedling heat mat speeds this up. Within two to three weeks you should see small green or pink shoots emerging. Sprouting turmeric before planting shortens the time your rhizomes sit dormant in soil and reduces the chance of rot.
Planting Methods For Beds, Grow Bags, And Containers
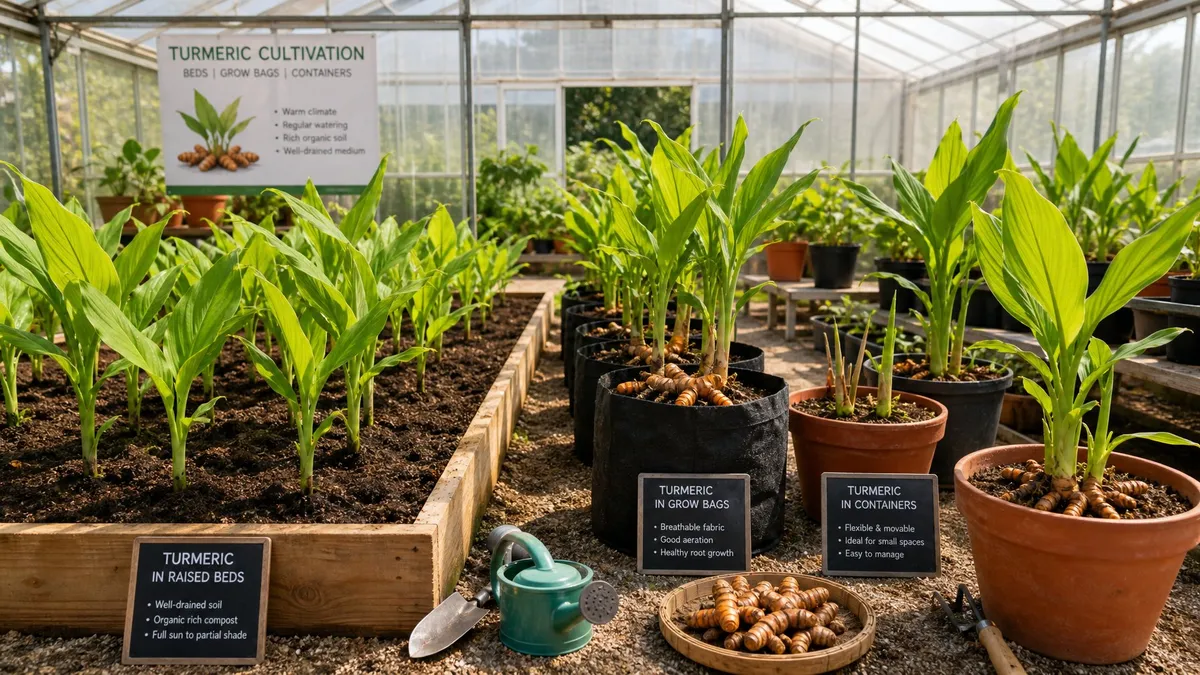
Whether you plant turmeric in raised beds, fabric grow bags, or deep pots, the basics stay the same: warm soil, good drainage, and enough room for rhizomes to spread outward over eight to ten months.
When To Plant In A Greenhouse
The best time to plant turmeric in a heated greenhouse is late February through early April. This gives the crop the full eight-to-ten-month window it needs to mature before the shortest days of winter.
If your greenhouse is unheated and you garden in a cooler zone, wait until soil temperatures hold steady at 55°F or above at night. You can start turmeric indoors on a heat mat in late winter and transplant the sprouted plants into your greenhouse once they reach about six to eight inches tall and nighttime temperatures inside the structure stay above 55°F.
In zones 8–11, planting turmeric rhizomes as early as February works well because passive greenhouse warmth is usually sufficient.
Depth, Spacing, And Bud Orientation
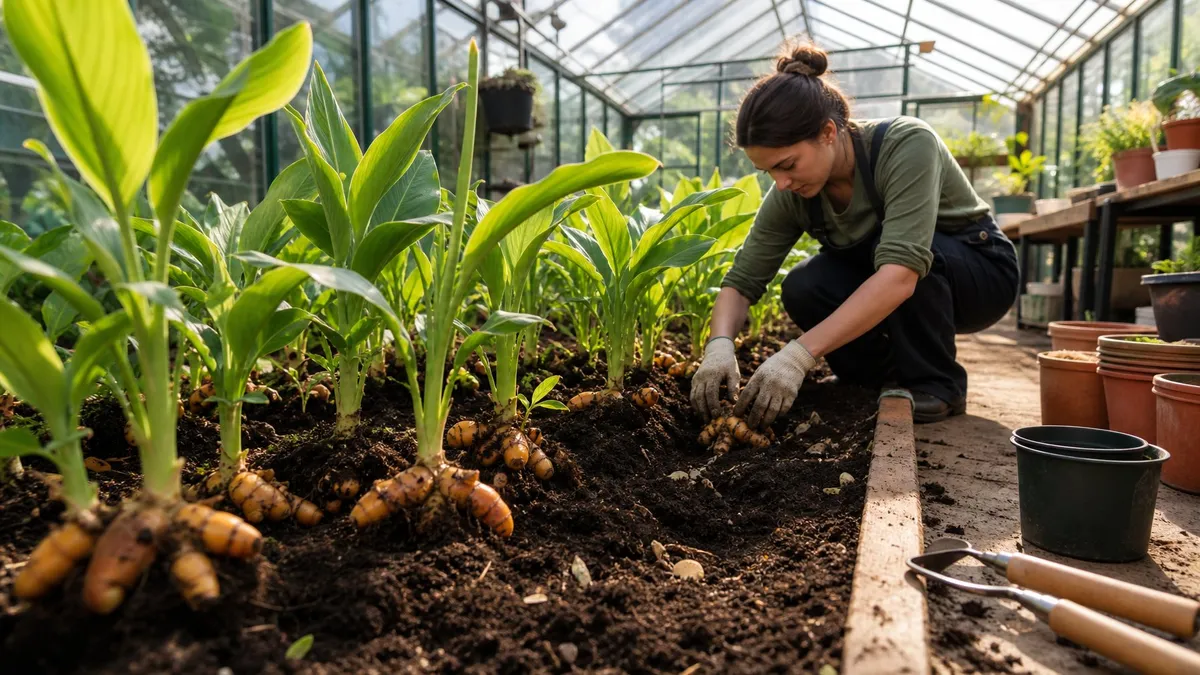
Plant each rhizome piece two to three inches deep with the buds facing up. This is the most important orientation detail; buds pointed downward will still sprout eventually, but shoots waste energy curving around to reach the surface.
Space pieces about 12 to 15 inches apart in rows set 18 to 24 inches apart. Turmeric rhizomes spread horizontally as they grow, so crowding leads to smaller harvests and poor air circulation.
Cover pieces with a loose, compost-rich potting mix and water gently. Avoid packing the soil down. Turmeric roots need to push through soft ground as they expand.
Turmeric In Pots Vs. In-Ground Beds
Pots and grow bags are ideal if you have limited space or want the flexibility to move plants for better light or warmth. When you grow turmeric in pots, choose containers at least 12 inches wide and 12 inches deep. A standard 5-gallon grow bag fits one or two rhizome pieces comfortably. Use a well-draining potting mix with plenty of compost.
In-ground greenhouse beds give rhizomes more room to spread, usually producing larger yields per plant. Amend bed soil with aged compost or well-rotted manure before planting turmeric. Ensure the bed drains freely; raised beds with a gravel base work especially well.
Both methods produce good results. Pots dry out faster and may need more frequent watering, while beds hold moisture longer but can be harder to harvest from without damaging neighboring plants.
Managing Temperature, Water, Feeding, And Airflow
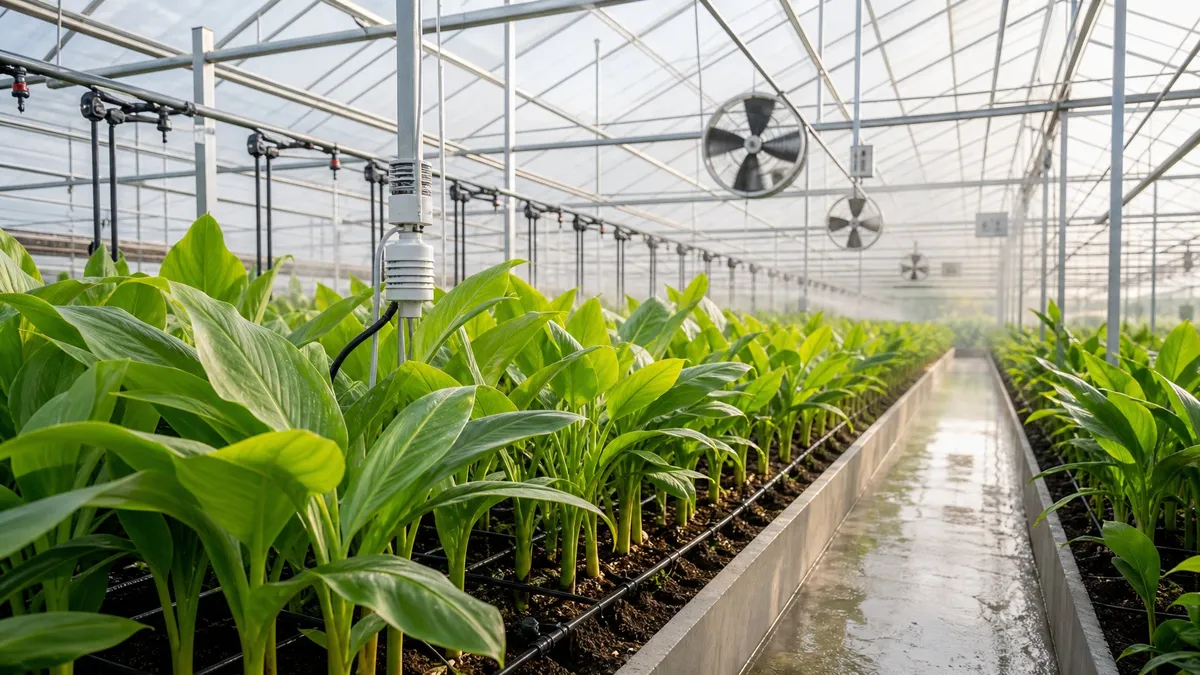
Turmeric's tropical origins mean it demands warm roots, steady moisture, regular feeding, and enough air movement to keep fungal problems at bay. Balancing these four factors inside a greenhouse is what separates a modest harvest from a truly impressive one.
Warm Root Zones And Night Temperature Targets
Root zone temperature is just as important as air temperature for turmeric. Keep soil between 70°F and 85°F during the day. At night, soil should not drop below 55°F.
Seedling heat mats placed under pots or trays work well early in the season when overnight temperatures still dip. For in-ground beds, black landscape fabric or dark-colored mulch absorbs daytime warmth and releases it slowly after sunset.
If you heat your greenhouse, set the thermostat to maintain at least 55°F at night. Thermal mass like water-filled barrels placed near your turmeric rows stores daytime heat and radiates it through the cooler hours. This approach can reduce heater run time and lower energy bills.
Watering Without Causing Rhizome Rot
Turmeric wants consistently moist soil, not wet soil. Overwatering is the fastest way to kill the crop. Soggy conditions cause rhizome rot, and since the rhizome is the part you eat, rot means total loss.
Water in the morning so foliage dries before evening. A drip irrigation system set on a timer delivers water directly to the root zone and reduces the risk of splashing soil onto leaves. Check soil moisture with the finger test or a moisture meter before each watering; the top inch should feel slightly dry before you add more water.
In containers, make sure every pot has drainage holes. Never let pots sit in saucers of standing water. Reduce watering gradually in the last month before harvest as the foliage begins to yellow and die back.
Fertility, Compost, And Seasonal Feeding
Turmeric is a heavy feeder. Before planting, mix two to three inches of aged compost or well-rotted manure into your soil or potting mix.
Begin liquid feeding about four to six weeks after planting, once you see active shoot growth. A balanced organic fertilizer (such as 5-5-5 or fish emulsion) applied every two to three weeks supports healthy leaf growth through the summer.
In midsummer, switch to a fertilizer slightly higher in potassium to encourage rhizome development. Side-dress beds with additional compost in July or August.
Stop all feeding about six weeks before your expected harvest date. This gives the plant time to redirect energy from leaf growth to rhizome storage and maturation.
Seasonal Care, Pests, And Common Greenhouse Problems
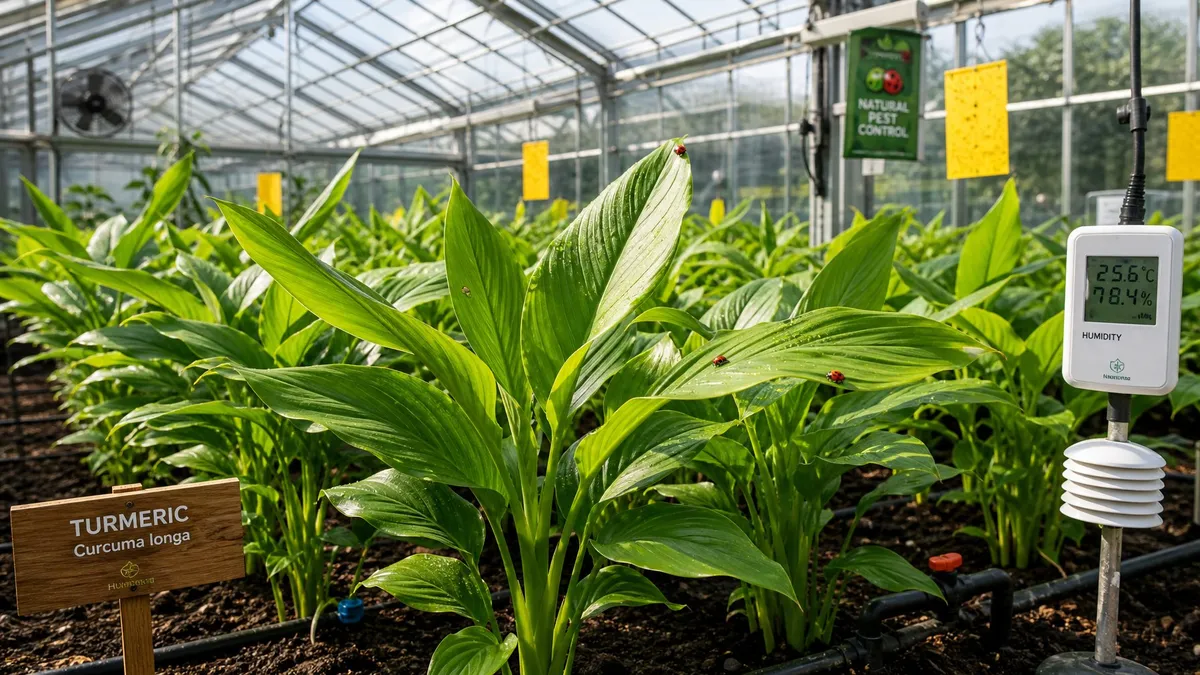
A turmeric plant's needs shift as it moves through its long growing cycle. Early-season care focuses on warmth and gentle moisture, while late-season care centers on supporting rhizome bulking and preparing for harvest.
Humidity Balance And Leaf Stress
Turmeric loves humidity in the 60–80% range. In a greenhouse, humidity often runs high on its own, especially in summer. The risk is tipping from "tropical" into "swampy," which opens the door to leaf spot fungi and bacterial issues.
Use roof vents, side louvers, or a small exhaust fan to keep air moving. Stagnant, saturated air around dense foliage is the primary trigger for fungal leaf problems. If humidity drops below 50% during dry spells or heated winter months, mist the leaves lightly in the morning or place shallow water trays nearby.
Brown leaf tips usually signal low humidity or underwatering. Yellowing lower leaves in midsummer may indicate overwatering or nutrient deficiency rather than natural die-back, which happens only near the end of the season.
Container Upsizing, Mulch, And Midseason Care
If you started turmeric in small pots, plan to up-pot into larger containers once the plant reaches 8–12 inches tall. Move to a pot at least 14–18 inches wide to give rhizomes room to expand.
Apply two to three inches of organic mulch (straw, shredded leaves, or wood chips) around the base of each plant in beds or large containers. Mulch holds moisture, moderates soil temperature, and suppresses weeds.
In midsummer, check for roots emerging from the soil surface. If rhizomes are pushing above ground, mound additional soil or compost around the base. Exposed rhizomes turn green and may develop a bitter flavor.
Pest Prevention And Sanitation Practices
Turmeric is relatively pest-free compared to many greenhouse crops, but a few problems can show up. Spider mites target stressed or underwatered plants. Keep foliage misted and plants well hydrated to discourage them.
Slugs and snails favor young shoots. Inspect plants in the evening and handpick any you find. Copper tape around pot rims or raised bed edges provides a reliable barrier.
Fungus gnats thrive in overly moist potting mix. Allow the top layer of soil to dry slightly between waterings and use yellow sticky traps to catch adults. Quarantine any new plants you bring into the greenhouse for seven to fourteen days before placing them near your turmeric.
Keep the growing area clean. Remove dead leaves and debris promptly. Good sanitation is the simplest, most effective pest prevention strategy in any greenhouse environment.
Harvest, Cure, Store, And Use Your Crop
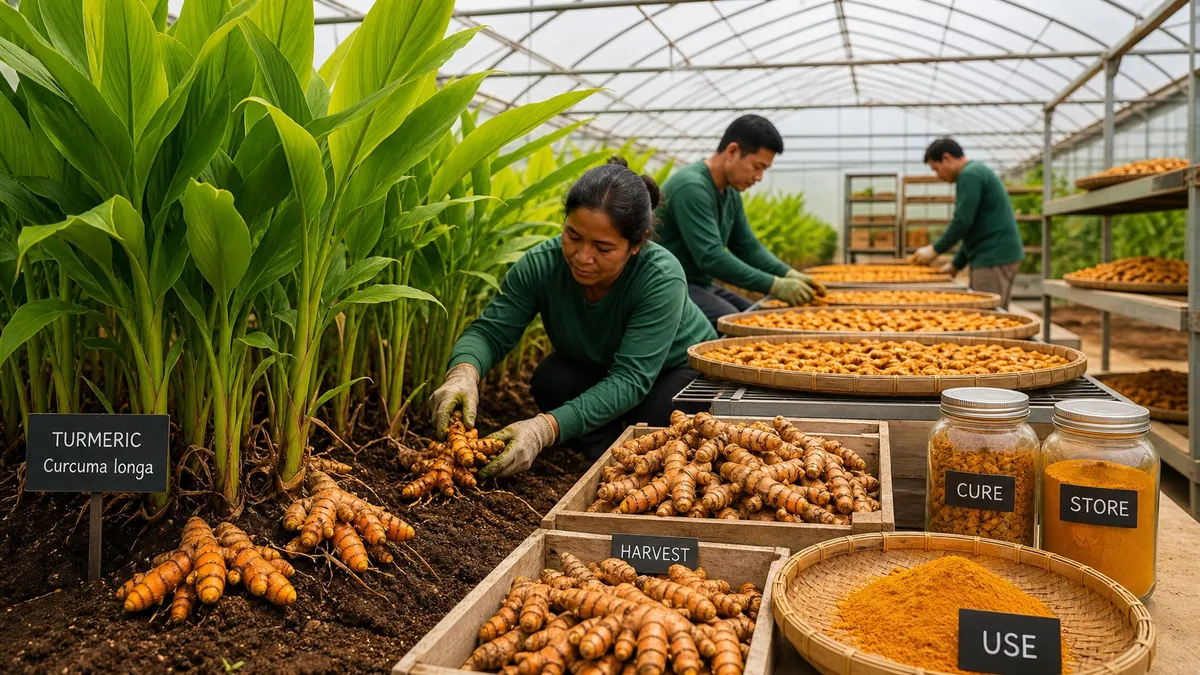
After eight to ten months of patient care, harvest day is one of the most satisfying moments in greenhouse gardening. Knowing when to harvest turmeric and how to handle the rhizomes after digging determines how long your crop lasts and how flavorful it tastes.
When Foliage Signals Maturity
The turmeric plant tells you when it is ready. As the growing season winds down, leaves begin turning yellow and brown from the tips downward. Stems soften and start to fall over.
This natural die-back means the plant has stopped sending energy to the leaves and has fully loaded its underground rhizomes with stored nutrients and curcumin. Do not rush the harvest. Let the foliage yellow completely before you dig. Harvesting turmeric too early results in smaller, less flavorful rhizomes with lower curcumin content.
In a heated greenhouse, this stage usually arrives between October and January, depending on when you planted.
How To Lift And Clean Rhizomes
For container-grown turmeric, simply tip the pot or grow bag on its side and gently slide out the root mass. Shake off loose soil and carefully separate the rhizomes by hand.
For in-ground beds, use a garden fork inserted 6–8 inches away from the base of the plant. Lever the fork upward slowly to avoid slicing through rhizomes. Turmeric roots spread outward more than downward, so work around the entire plant.
Rinse the harvested rhizomes under cool running water and use a soft brush to remove clinging soil. Handle them gently; bruised spots spoil faster in storage.
Set aside several firm, healthy pieces with good buds for replanting next season. You can start turmeric indoors again in late winter from your own saved seed stock, building a self-sustaining cycle.
Short-Term Storage, Drying, Freezing, And Replanting
Fresh storage: Place unwashed or lightly washed rhizomes in a paper bag or wrap them loosely in a paper towel, then refrigerate. Fresh turmeric keeps for about two to three weeks this way.
Freezing: Freeze whole or sliced rhizomes in airtight bags. Frozen turmeric grates easily and retains most of its flavor and color for six months or longer.
Drying and making turmeric powder: Slice rhizomes into thin rounds (about 1/8 inch). Dry them in a food dehydrator set to 135°F or in a low oven until completely brittle. Grind the dried slices in a spice grinder. Store turmeric powder in a sealed jar away from light. One inch of fresh turmeric root yields roughly one teaspoon of dried powder.
Replanting: Store your saved seed rhizomes in slightly damp peat moss or vermiculite in a cool spot (50–60°F) until late winter. Check monthly for mold or excess drying, and mist lightly if they begin to shrivel. Replant them following the same steps you used the previous season.
Fresh turmeric is wonderful grated into soups, smoothies, stir-fries, and a classic turmeric latte, which blends warm milk, ground turmeric, and spices like cinnamon and black pepper.
Frequently Asked Questions
What temperature and humidity levels does turmeric need to thrive under cover?
Turmeric grows best with daytime air temperatures between 68°F and 86°F and nighttime temperatures no lower than 55°F. Humidity should stay in the 60–80% range, with gentle air circulation to prevent fungal issues.
How much light does turmeric require, and is supplemental lighting necessary in winter?
Turmeric needs six to eight hours of bright, indirect light per day. In northern climates with short winter days, adding four hours of supplemental LED lighting helps maintain steady growth and prevents the plant from going dormant too early.
What is the best soil mix and container size for growing turmeric in pots indoors?
Use a well-draining potting mix enriched with compost, and choose a container at least 12 inches wide and 12 inches deep. A 5-gallon grow bag comfortably supports one or two rhizome pieces, giving roots enough room to spread over the growing season.
Can turmeric be started from store-bought or dried rhizomes, and how should they be prepared before planting?
Store-bought organic turmeric can work, but some rhizomes have been treated with growth inhibitors that prevent sprouting. Look for plump, untreated rhizomes with visible buds, cut them into pieces with one or two eyes each, let the cut surfaces callus for two to three days, and pre-sprout on damp paper towels in a warm spot.
What are the most common pests and diseases affecting turmeric plants, and how can they be prevented?
Spider mites, slugs, snails, and fungus gnats are the most likely problems. Keep foliage misted to deter spider mites, use copper tape or evening handpicking for slugs, and let the soil surface dry slightly between waterings to discourage fungus gnats. Rhizome rot from overwatering is the most serious disease risk, so always ensure excellent drainage.
Does turmeric regrow each year, and how should it be overwintered and stored between seasons?
Turmeric is a perennial that regrows from saved rhizomes. At harvest, set aside healthy pieces with strong buds. Store them in slightly damp peat moss or vermiculite at 50–60°F through winter, checking monthly for mold or drying. Replant in late February or March to start a new cycle.